My blog is called "Creative Smiles" because my designs are the result of incorporating mistakes. With fumble fingers that drop whatever they are holding - repeatedly, it takes a lot of giggles, smiles and creative patience during my crafting process. xx

Showing posts with label Stencils. Show all posts

Monday, August 26, 2024

Fat Snowmen Last Longer

Hello, dear friends! Just a moment to thank you for visiting and leaving encouragement. We're coming to terms with my "new" limitations. Your kindnesses help me more than you know... so THANK YOU!

Here is another fat snowman, reminding why sometimes being fat might be beneficial - LOL - we all know THAT'S not true, but it's a good story!


This happy little guy was stamped and snail mailed by a friend for me to color and assemble. Cute stenciling for the background.


He is colored with Copic Markers and Distress Inks. A stenciled background was done with Iced Spruce ink. The dies (listed below) and papers are all from my ancient stash (giggle).

To create the sparkling snow, I applied VersaMark ink and clear EP. After that was melted, a VersaMarker was applied atop the melted clear EP. I dumped a ton of clear glitter on it, and re-melted the EP from the underside of the image. After putting a little more glitter on top of the melted EP+Glitter combo, I reheated it from the under side again. It's really sparkly and the embossing powder holds the extra glitter so it won't rub off!


Products: Cute Snowman from a friend, Clear Glitter, Clear Embossing Powder, Copic Markers, Distress Inks, VersaMark Ink, VersaMarker, Stencil for background, K&Co designer paper, Marianne Creatables Anja's Large Ovals die, Spellbinders Labels 23 Grand die, MS Starlight Punch

I'd like to play in the following challenge please (and thank you to the DTs who make the challenges possible):

  1. 52 Christmas Card Throwdown Technique Challenge 8-24 EMBOSSING (To create the sparkling snow, I applied VersaMark ink and clear EP. After that was melted, a VersaMarker was applied atop the melted clear EP. I dumped a ton of clear glitter on it, and re-melted the EP from the underside of the image. After putting a little more glitter on top of the melted EP+Glitter combo, I reheated it from the under side again. It's really sparkly and the embossing powder holds the extra glitter so it won't rub off!) 09-07

Stamping hugs,


Tuesday, November 14, 2023

A Little Christmas -

 Hello, my friends! I can't believe I've actually finished a card (5 months in the making) and that I'm posting it as well. 

Many thanks for all your cards of encouragement. Once Jack and I learned that I am at my Maximum Medical Improvement (meaning a continued "down hill" trend), and that symptoms will continue worsening, it became easier to accept. We have left "no stone unturned". With each layer of loss, I need to accept the new level. This is a neuro-immune disease that begins in the brain, filtering into all the body's functions and organs, thus causing one event after another. About 1/2 of a percent of the world's population contends with Myalgic Encephalomyelitis. Some have it mildly, others have it severely. I've dealt with this since early childhood, and have gratefully lived longer than anticipated. 

YOUR ENCOURAGEMENT in the form of Love, Support and Acceptance is the best of all gifts! Life is much easier to enjoy when friends are by your side, so that the sick person doesn't have to constantly fake that they are "better" or that they will get better. THANK YOU FROM THE BOTTOM OF MY HEART for your precious gift. 

Today I'm presenting a sweet snowman image stamped and snail-mailed to me by friend Brenda Smalle. (Thanks, Brenda!) Brenda and I used to work together at Sparkle N Sprinkle, and I learned so much from her!


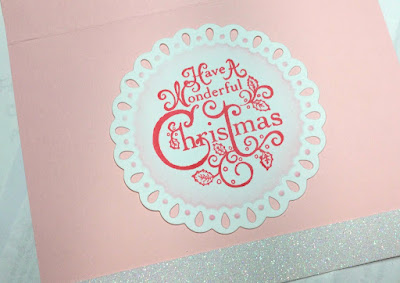
Interior:

After coloring with Copics, I stenciled the background clouds with MFT stencil and masking a few "ski slopes" surrounding Mr. Snowman. The dark green layer was die cut then embossed with a dotted EF, and inked with Pink Pearlescent inks and Black Soot DI. It was fun playing with a wee bit of glitter, too - all done in non-traditional Christmas colors because pink is THIS snowman's color of preference.

Products: Cute Snowman Image from friend, sentiment from Heartfelt Creations, Copic Markers, Craftwell Delicate Dots EF, Marianne Creatables, Tonic & Spellbinders die cuts, INKS: Orchid Pearlescent, Spun Sugar DI, Salvaged Patina DI., Worn Lipstick DI, MFT stencils, silver and clear glitters, MS border punch.

Playing in the following challenges:

  1. Classic Design Challenge #11 (11/15 - 12/15) AG 12/15
  2. Pammie's Inky Pinkies #2345 AG 11/21
Thanksgiving Hugs to you!


Monday, November 21, 2022

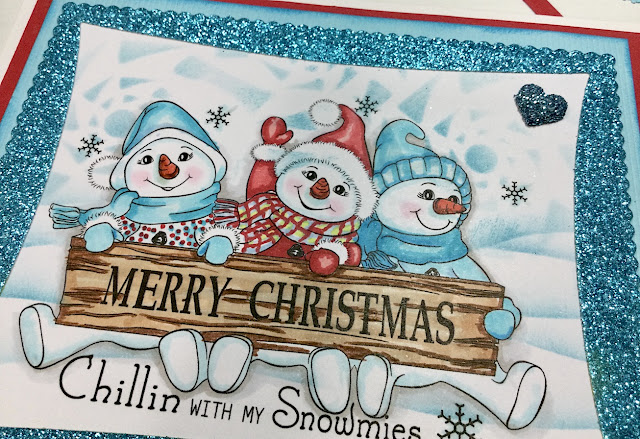
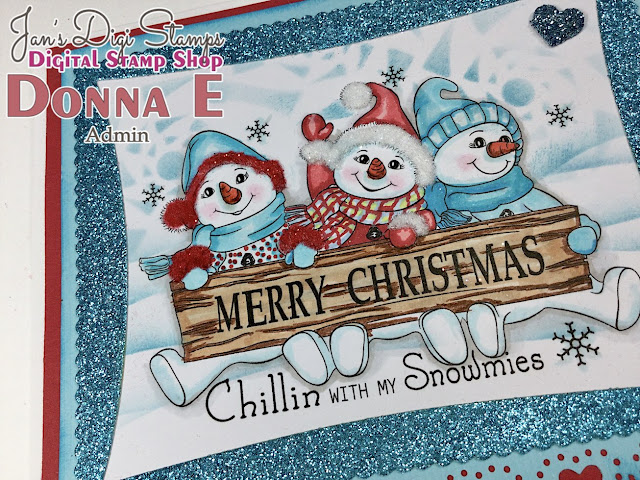
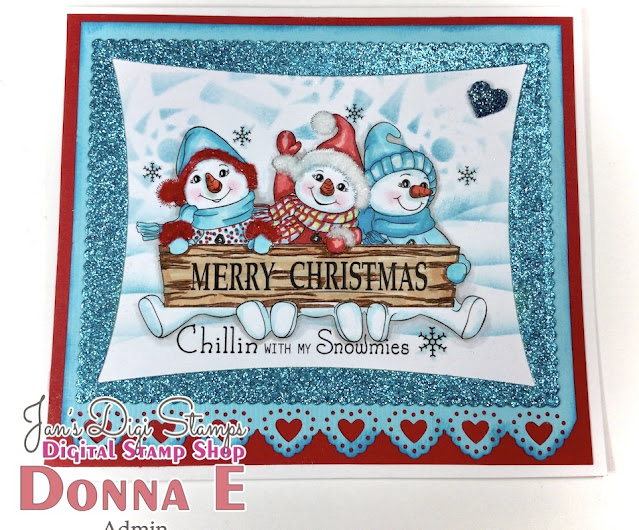
Chillin' with my Snowmies - Jan's Digi Stamps

 I may be chillin' but not with my snowmies! I feel for all of you in the areas where several feet of snow has changed EVERYTHING in your worlds! Hoping your homes are unharmed, and that you are snug and safe.


This darling little snowman set is the cutest ever! I couldn't stop coloring Jan's "SNOWMIES" because they made me happy! The Merry Christmas sign affords a break in the snowmies' bodies, so they can either wear a sweatshirt or be "au naturale"! LOL

 Today's cards are for the mid-month reminder of November's Anything Goes Challenge at Jan's Digi Stamps!  If you use a JDS image in your card, please mention it. There is a 2nd draw specifically for those who use one of Jan's fun images.

Snowmies is debuting at $3.75 instead of its regular $5 price. There are 3 charming black-and-white images, 3 beautifully colored images, and 3 fun sentiments in this set.


December's Sale includes all 50 of Jan's Holiday Stamps. Be sure to take advantage of her beautiful 2022 freebie Ornaments 2022!

While there are many fun frame dies on the market, I used one sweet scalloped rectangle die for the outside, and then a different shaped die for the inside, to create these frames:


Also on these cards, I used a freebie "font" called Freebie Font WWFlakes. Instead of an alphabet, you get some 30 different snowflakes which can be made itty-bitty or as large as your font numbers will take you, in order to create all kinds of fun accessories for your winter scenes.

SOME QUESTIONS FOR YOU:

While some of my stamping friends industriously make several of the same design, I'm unable to make duplicate cards without it becoming a tedious chore. Do you find that to be the case? Or are you able to make lots of the same card? These are all utilizing the same sketch, so I think that counts. My other crafting deficiency is that I forget EVERY-SINGLE-TIME to set out my papers, embellies, colors PRIOR to coloring, so then I spend a lot of time trying to mix and match after the images are colored. Are you organized and efficient? Or do you fall into my category of trying to find things that look good together after the images are colored?

My only planning was in making glittery frames and using stencils LOL
Since several companies are featuring "flocking, fluff, and fuzzy stuff" again, I got out my Flocking that contains glitter, and put it on two outfits for these cuties.

BF (before fuzziness) giggle:
(psst! the heart brad was heated and dipped into embossing powder that contained glitter)

AFU (after fuzzy'ing up!) more giggles:
(both red and white were used on this card)


Debuting next we have non-traditional in purple and pink fashion statements:


Finally
We have the red-green outfits. And NOOOOOOOOO, these snowmies are NOT sitting on grass. It is FANTASY SNOW to coordinate with their attire, in case you couldn't guess (more giggles):


I hope you enjoyed this rainbow of snowmies. "We" (Snowmies and Myself) were greatly entertained in selecting our fashion colors! Don't forget to play in the Challenge!

Products Used: Stamps  Jan's Digi Images: Chillin' with my Snowmies,  Freebie Font WWFlakes (for the snowflakes), SU En Francais bkgrnd stamp, IO CAC Screen, Dies: SB Labels 23, SB Wonky Rectangles, IO border die #18V, Tonic Mixed Edge Rectangles, MS Starlight Punch, MS Lace Punch, MS Heart Punch, Other: Express-it cardstock, Alcohol Markers (Copics, CopicMultiliner, PrismaColor), Glitter cardstock, assorted stencils, assorted Distress & Oxide inks, VersaFine Clair, Flocking, embossing powder.

I'd like to play in the following Challenges please:

  1. World Wide Open Design Team Challenge #11 AG DT 12/15
  2. Pammie's Inkie Pinkies #2247 AG 11/28
  3. Crafty Catz #614 Christmas 11/23
  4. A Perfect Time to Craft Open Challenge #11 AG 12/1
  5. Classic Design Challenge #11 AG 12/1
  6. Crafty Friends Challenge #161 Christmas 11/28 
  7. CD Sunday Plus Challenge #97 AG using downloadable products ( I used digital stamp with a font that makes snowflakes) 12/1
Stamping Hugs,


Thursday, February 27, 2020

Lavinia World #21 - It's a Beautiful Day!

Greetings, blogging friends!
As soon as I saw blogging friend Donna Thielker's THTSB creation, I knew I wanted to get my Oxides out and finally experiment. There is a bit of a learning curve with them (in my opinion), but here is my first attempt. Donna, thank you for inspiring me!


It is time for a new
Lavinia World Challenge!

Details of our Lavinia World ChallengeWinner receives
a $15 gift certificate to the Lavinia World store. Submissions can be placed either on our Lavinia World Challenge blog which has an ANYTHING GOES theme using ANY brand clear or rubber stamp - no digitals. Or you may play in our friendly Facebook Group called Anything Lavinia if using ANY Lavinia Product in your creationEither way, we enjoy seeing your artwork!

Today's fairy story 


Today's Make-A-Wish Fairy reminds us that we need to occasionally take ourselves "away", allowing our dreams to bloom from deep in our hearts, and shed seeds along our Life's journey, to come to life in their own way. But first, we have to begin a quiet odyssey allowing those beginnings to come to Light.

Have you ever noticed how many of our dreams have "come true" but not in the ways we had originally anticipated?

Onward... to my little card...
I used Distress Ink foam applicators to apply my inks, which was part of my "learning curve". Next time, I'll use my brushes (which I had forgotten about LOL). After inking my 5x7 panel, I spritzed with water and added kosher salt crystals to make a little texture:


After this dried, the salt was brushed off, and a Heidi Swap stencil was lightly inked with Distress Ink in Pumice Stone. The Sparkle sentiment was also inked with Pumice Stone and added to the background. All the images were inked with VersaFine Clair Rain Forest Green and heat set with clear embossing powder.


Wink of Stella Clear and Uni-Ball Pen Signo Gel White were both used, first on the fairy's wings and then on the other stamped elements. Diamond Dust (textured glitter) was also added:


Here's a final look at the card on an angle to capture it without the glitter and shine. After trimming the original white panel, the card size is 4.25" x 6.5":


Thanks for visiting today!
My Lavinia World Products:


Products Used:

Challenges I'd like to play in please:
  1. My Time to Craft #426 No Digi's Allowed this week 3/7
  2. Creative Moments #185 AG + "for the girls" 3/5
  3. World Wide Open DT Challenge #2 AG DT 3/15
  4. *New* Classic Crafty FB Challenge (Feb)  AG 3/1
  5. Creative Knockouts Challenge #339 Die Cuts and Punches (IO Small Grass 178C, MS Geometric Frames Punch) 3/5
Stamping Hugs to you, my dear blogging friends...


Thursday, February 13, 2020

It's a Beautiful Day to Embrace Love - Lavinia World #20

Welcome, friends, to my humble blog.
It is my sincerest hope that you are each doing well, and that your families are enjoying good health.

Today's post includes a project "outside" my normal creative-style box, using new-to-me techniques, so I'm going to point out my boo-boo that I did not fix. Maybe you will learn from me, so you won't do the silly thing I did.


It is time for a new
Lavinia World Challenge!

Details of our Lavinia World ChallengeWinner receives
a $15 gift certificate to the Lavinia World store. Submissions can be placed either on our Lavinia World Challenge blog which has an ANYTHING GOES theme using ANY brand clear or rubber stamp - no digitals. Or you may play in our friendly Facebook Group called Anything Lavinia if using ANY Lavinia Product in your creationEither way, we enjoy seeing your artwork!

Today's story 


It's time for all creation to re-awaken to Love's own song! 
Trinity Fairy says we are to bring the Color of Caring to all the inhabitants of our precious planet!

I started by die cutting my own masks. To do this I used NON-HEATABLE-NON-EMBOSSABLE acetate sheets. These are much easier to die cut than the more durable acetate. The detailed stencil on the right is from my stash.


Sorry, I did not take photos.

My boo-boo's.

  1. Next, I applied the circle mask to my 6.75" x 4.75" white panel and put the stencil on top, distressing here and there with Antique Linen ink, and a bit more with Scattered Straw ink.
  2. Using Fairy Spells stamp, I randomly stamped with Walnut ink. HINT: Next time, I will leave more open space by stamping the background fewer times.
  3. With Walnut ink and a finger dauber, I pulled color from the center off the round mask outward. HINT: Next time, I will make the color more intense and pull it out slightly more, for more drama.
  4. Using another finger dauber and Spun Sugar Pink ink, I brought out more color from the center of the mask, in a starburst fashion, so some areas extend further out than other areas. HINT: Next time, I will make a greater fluctuation of the colored areas.
  5. After Removing the round stencil/mask, I applied the negative stencil/mask on top. Line up the circle. I placed another mask on top of that open circle. With Spun Sugar ink, I created detail on the magical "moon" and pulled Scattered Straw color INWARD toward the center of the circle.
  6. Finally I stamped the fairy with Pinecone Versafine Clair ink. Immediately, I realized my mistake. Do you see it?


I SHOULD HAVE:

Probably many of you know better than I - because my Logic works "backwards" when it comes to figuring things out. But it seems to me that once I figured out where I wanted the moon, I should have stamped the fairy FIRST, THEN applied the moon mask and carefully pulled colors around the fairy, so the moon would not show through her hair. Our should I have simply colored her white hair a darker color than the moon? What is the correct answer for remedying this design error? Thanks for your feedback.

Close up of the boo-boo:


With Pinecone Versafine Clair ink, I stamped the sentiment on vellum, and heat set with clear embossing powder. The sentiment is already distressed around the letters. Also, please notice the little stars floating to the heavens from her horn, reaching out to the universe for anyone who will listen to the Call:


The dragonfly brad was made hot with my heat tool and then dipped into a bottle of EP to change the color from hot yellow to bronze. I especially like embossing powders that contain mica powder for this technique. A Sakura Quickie Glue Pen added glitter to her wings. The edges of the card are distressed with Golden Meadow Versafine Clair ink and heat set with a champagne colored EP that has lots of light glitter colors in it.


Thanks for stopping by today. I hope you will upload at least one submission to our challenge for an opportunity to win a $15 store credit. AND IF YOU KNOW THE ANSWER TO MY QUESTION ABOVE, will you please let me know either via email or in a comment below? Thanks.


Products Used:

Challenges I would like to support please:

  1. Addicted to Stamps and More #376 Anything Goes 2/19
  2. Wednesday's Creative Inspirations Challenge (Feb 5) Anything Goes 3/4
  3. Unicorn Challenge #51 Anything Goes 2/28
  4. Classic Design Challenge #2 Anything Goes 3/1
  5. Love to Craft Challenge #43 Anything Goes 3/1
  6. Pammie's Inky Pinkies #2006 AG 2/16


Fairy Kisses,


Wednesday, October 17, 2018

Beautiful Stencils - Back to the Basics and Beyond

So glad you could visit today, Blogging Friends!
Hope you and your family are well.

and now...

It's time for a brand new Back to Basics and Beyond Challenge!


For the next two weeks, join us by uploading an "Anything-Goes" project as long as a masking or stenciling technique is used. The team has all kinds of inspiration and a variety of styles to view, so take a look! Hope to see yours there.

Here is what I used. The black tray has water in it:


After die cutting the paper, I angled the stencil on the pieces and taped the edges to keep the panel clean:


This is what the glimmer paste looks like while it is still a little wet. It took about 5 minutes to do all 4 pieces, including the taping process. The glimmer paste was completely dry within 15 minutes, even in our extremely humid weather:


The dried glimmer paste is the sparkliest product I've ever seen!


This is what the card would look like in a CAS format:

After dry embossing the background with Tonic Layered Leaves I smooshed Brilliance Gold Galaxy ink on top.


I die cut two smaller tags, running one through a wavy crimper, and embellishing with Gold Galaxy. The 2nd tag was dry embossed, smooshed with mustard Staz-on ink, then Forest Moss ink - heat set, and covered with more Gold Galaxy.

The Merry Christmas die was cut with two different papers - one ivory for the background, and the other in gold glossy paper.


Gold Tinsel embossing powder was applied to the edges of the crimped large panel in the background. Finished monochromatic creation:


Thanks for dropping by today! Hoping you are inspired to try products in your stash and enter the challenge!


Products:

  • Embossing Folders: Tonic Layered Leaves (background - this EF has a beautiful parallel frame on it), Craft Concepts Secret Garden (tag)
  • Dies: Tonic Grand Gala Bunting Set (large tag layers), Tonic Merry Christmas 1772e, Taylored Expressions Banner Stacklets #1
  • Embossing Powder: Gold Tinsel (distressed edge)
  • Glimmer Paste:  Golden Crystal - so aptly named! (all the fabulously glitter-ific Glimmer Paste colors are here.)
  • Inks: Brilliance Gold Galaxy, Staz-on Mustard, Distress Forest Moss
  • Wavy Crimper, EK Success edge punch (for the white edge on the tag)
  • Cardstock: Thyme, Pale Kraft, Ivory, White, Gold Glossy, White Vellum

Challenges I'd like to play in please:

  1. Mix It Up Challenge #18 AG + Monochrome 11/5 (sep post)
  2. Holly & Ivy Christmas Challenge #38 AG Christmas 10/20     C15
  3. The Merry Christmas Challenge (Oct 15-Nov 14) AG Christmas
  4. ScrapyLand Challenges #100 AG w/dies SL sells (2 Tonic sets, TE set)
  5. Christmas at Sweet Stampin' AG Christmas 11/10 (sep post)
  6. Classic DT Open Challenge  #10 AG DT 11/1 (sep post)


non-stamping hugs,

Friday, December 01, 2017

Sasayaki Glitter - 2 Crafty Critter Crazies

Hello, Critter-loving Friends!
I'm so happy to be seeing you again.


It's time for a new challenge at

2 Crafty Critter Crazies!

Sasayaki Glitter is sponsoring December's challenge, which ends December 30. A random winner is selected, and a guest designer for the upcoming month is chosen.

I am featuring Little Miss Teacup Mouse!


Colored with Copic Markers, she slurped her way through yummy hot chocolate in her china teacup. Even her fur coloring changed to a rich chocolate hue!

The teacup was coated with VersaMarker, and heat set with SNS clear detail embossing powder. Great shine, isn't it? (All that "white" in the cup is actually shine from the light on the clear EP)


Burnished Bronze Dream Weaver stencil paste was applied to K and Company designer paper, and allowed to dry into this amazing color!

The dies are Spellbinders Labels 8, and Sue Wilson Melbourne.

I accidentally dropped my round die cut with the mousie, and it adhered in the wrong place on the card, but that's how it goes sometimes. The adhesive was too strong to pull back up. Has that happened to you?
(While it's sad that it fell where it did, at least it fell relatively straight, right?) lol

The background cardstock was dry embossed and inked with the same abandoned coral distress ink as the image's circle.

Thank you for popping by today!
Don't forget to upload your creations that feature a critter at

2 Crafty Critter Crazies!

hugs,
Donna

Monday, January 26, 2015

Stencils and Paste {Sweet Stamps}


Hi! This is my final project as January Guest Designer for Sweet Stamps
It's been a fun month, and I appreciate the opportunity.

The Sweet Stamps Blog challenge this week is STENCILS AND STENCIL PASTE. Please visit the Sweet Stamps Blog to see the beautiful inspiration the Sweeties have designed for you! 


Today's project uses Sweet Stamps' Dot Butterfly 438 stamp image, and Sweet Stamps Petaloops stencil.
Split Coast Stampers has a fabulous tutorial for using stencils, paste and adding glitter to the wet paste.

Sadly,
Stencil Paste has long been abandoned in my stash of goodies. I opened my box labeled "Stencil Paste". The last dated projects in it were dated 2006.   SIGH  So this was a good challenge for getting me out of my comfort zone. After applying the white opaque paste, I lightly spooned Sparkle N Sprinkle Guava Nectar Glitter on the wet paste, and set it aside to dry. In real life, it is quite sparkly, with great dimension.


The pretty Sweet Stamps Dot Butterfly was stamped on semi-opaque vellum and embossed from under the paper using Sparkle N Sprinkle Winter Copper Dreams EP.


More Glitter was glued onto the front of the butterfly.

The white frame was smooshed with VersaMark ink and embossed with Winter White Sparkle EP.

TIP:
The frame was made using two Spellbinders Card Creator nesting dies. The larger size for the outer white frame, and the next largest size for the interior frame:

BEFORE CUTTING
AFTER CUTTING
(use the exterior portion of the cuts)
I hope you can visualize the sparkly happiness on this project, right down to the blue rhinestones!


Products Used:


Entered in these fun Challenges:

  1. Crafting for All Seasons #94 "Things With Wings" 2/1
  2. Crafty Creations #281 "Something Old, Something New" (old - my long forgotten stencil paste, which was still good after 8 years of being neglected) (new - stencil, both SB dies, Butterfly image) 2/4
  3. Inspiration Destination Challenge #17 Anything Goes! 1/27
  4. Lil Red Wagon Challenge #273 "Shhhhhh!" (no text) 1/27
  5. Amusing Challenge (Jan 25) Anything Goes 2/1
  6. Lil Patch of Crafty Friends #2 Anything Goes 1/30


Thanks, as always, for visiting and sharing your thoughts,