My blog is called "Creative Smiles" because my designs are the result of incorporating mistakes. With fumble fingers that drop whatever they are holding - repeatedly, it takes a lot of giggles, smiles and creative patience during my crafting process. xx

Showing posts with label Impression Obsession. Show all posts

Thursday, November 27, 2025

Winter Pink Birthday Card

Hello, everyone! It is my sincerest hope you are doing well this holiday season. 

Today's birthday card is for a very dear friend. Birthdays in December often mean "seasonal" themed cards, and this one is no different! Being a rather new stamper, my friend enjoys challenges with new techniques and products. It's fun seeing stamping "anew" through her eyes. I've always enjoyed making dimensional cards with flowers, embellishments and other themes. Like many of you, once the post office changed the "thickness" rules, I altered my style. But since this is being delivered in person, I took advantage of that by creating a "thick" card!

After taking over 20 shots, I gave up! The pure white feathers show up as a drab gray. I think maybe the tininess of each feather barb, and the thinness of the "afterfeathers" created a shadow beneath, making the white appear gray. Has that happened to you when photographing white feathers? 


Taking a cue from Leslie Miller, I've produced an "off-size" skinny (slimline) card 4.25" x 7.25". With several layers, lots of sparkle was added to match the sparkle of Ana's personality. I sure do wish the sparkle showed up better. From my "pieces box", I put together lots of odds 'n' ends. The poinsettia petals all have a thick coating of clear glue mixed with highly textured glitter and mylar glitter. The center is comprised of Prills (I have a ton of those in my stash from some 8-9 years ago in a host of colors!). The luster balls have florist wire and were purchased at least 10 years ago from Hobby Lobby's bridal section. There is a paper raffia piece which was inked in pumice stone, and metallic silver netting from a wire ribbon. 


The French background script is from a virginal SU 5x6 wood mount stamp at least 20 years old. This card was SO MUCH FUN to make, using stuff from my "unfinished box" stuff, and old crafting goodies crying to be used!

Inside:

On the inside is a pocket for a gift card, adorned with the same MS punch as used on the card front and on the borders of the interior sentiment. I really do love the old MS punches. To make the simple pocket, I cut cardstock one inch wider than necessary, scored the two sides at 1/2 inch, and the bottom at 1/2 inch. Niche the corners for the fold to fit neatly. Adhere the back so that the niched places are glued to one another rather than to the pocket itself, so the gift card can slide in and out easily. Wish I had taken a photo of that for posterity (giggle).

Products:   Dies: Sue Wilson Noble Dies Double Pierced Bkgrnd CED5512, SW Dandelion CED1434, IO Pine Branch DIE021, IO Pine Sprig DIE319, MS Floral Crochet PAP Punch, MS Holly Punch, Stamps: Freebie Sentiment (shared below), SU En Francais script background stamp, SU birthday Warmest Regards stamp, Cardstock: SU pink & Green, white, old designer paper, Vellum,  Inks: Pumice Stone, Shabby Shutters, Peeled Paint, Worn Lipstick, Spun Sugar, VersaMark, Other: Feathers, Chunky Clear Glitter, Clear Mylar Glitter, Silver ultra fine glitter, Green EP with Glitter, Lime Prills, embellishments from the bridal section of Hobby Lobby, Silver Metallic Ribbon Netting, Paper Netting inked with pumice stone.

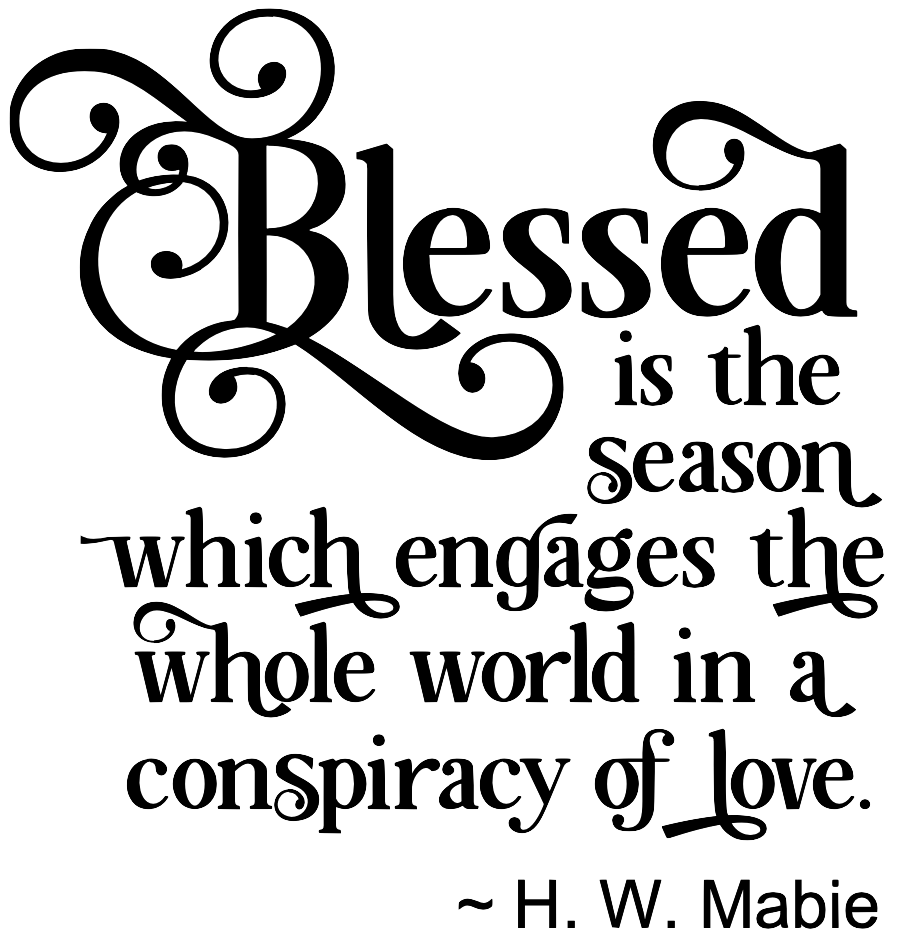
My gift to you - Arrangements of the same sentiment - one for any day and one for birthday - for use on the inside or outside of your projects. Please do not sell these Sentiments. Use on any of your projects, including projects involving any design teams you might be on.

Click on the image to bring it to full size. Because of the changes Google Made with Blogger (June 2020), your image will appear to be solid black. Don’t panic. Right click and do a SAVE AS PNG. Once it is saved on your hard drive, you can open it and it will have a transparent background. I create PNGs instead of JPGs so they can be placed anywhere on a scene or project, and so backgrounds can be made using them. Please let me know if you have any problems. I hope they serve you well!

Enjoy!


Thanks for stopping by.


I'd like to support the following challenges by playing in them please:

  1. Fab 'n' Funky #626 All That Glitters 11/2 (sep post week later) (silver, clear, chunky, mylar glitters (inside and out).
  2. As You Like It Challenge Nov 27 "Gold, Silver or Glitter and Why" 12/11 If it is glittery, it's for me! This birthday card is made for Ana who LOVES glitter and glitzy things. Although the mylar and chunky clear glitters are not showing up very well in photography of the poinsettia flower layers, the sparkly silver glitter is merry sparkle for the season inside and out. Glitter is amazing in its many uses. Thanks for the fun challenge!
  3. Elliebelle's Garden Party #9 Anything from a Garden 12/8 (poinsettia flower) (FU #11)
  4. Pammie's Inky Pinkies #2547 AG 11/30
  5. Creations in Pink #87 AG in Mainly Pink 12/13 (sep post)
  6. Tic Tac Toe Challenge #284 (Using left to right diagonal - Embellishment, Free, Flowers) Several embellies feather, paper raffia, metallic net ribbon, prills, pearls. 12/11 sep post week later


Thursday, April 17, 2025

Left Over Pieces + New Pieces = Finally-Finished Cards

Welcome, Blogging friends! I have missed you!


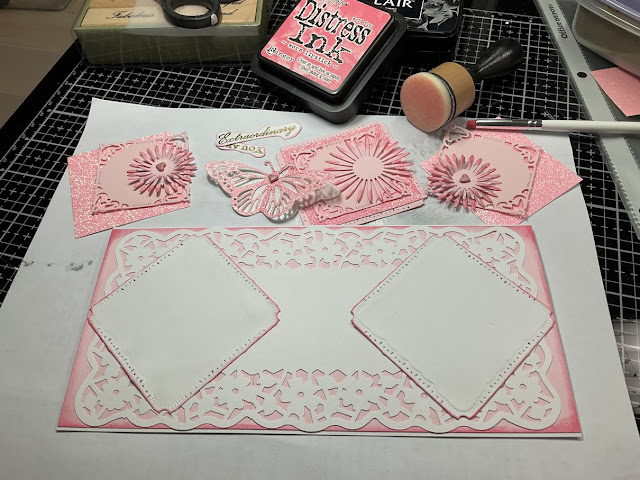
Still plugging along in my "unfinished stuff" boxes, these creations have been in the works for the last 6 weeks. I came across some pink and white Spellbinders decorative squares elements already cut out - probably 15 years ago - they were crying out to put put on a project! So I added some Impression Obsession butterflies and Tattered Lace flowers, enjoying designing The Old dies with The Virginal dies. The designing was fun, too - especially with the addition of sparkle in one of my favorite colors PINK!

Here are some of the pieces I started with before adding the whimsy:


Because the bottom layers overlapped in some places, shims were needed:


With the shims prepared and glued in place, the diagonal square in the middle could be added:


Next... to adhere the fun die cuts:


To shade some of the pink areas (included the pink glitter paper), Worn Lipstick DI was applied. See the difference?


The vellum "butterfly shadow" is pearly, so it picked up the pink tones without coloring. The other butterflies with pink frames around them were "inked" with Worn Lipstick atop pale pink cardstock. The die cut sentiments were cut from pink glitter paper, darkened with Copic Marker RV32, and shadowed with a pale slate blue cardstock:


Two more cards, one using Ana Griffin's sentiment set:


Upon finishing the cards, I decided some pop up elements on the inside would be fun. It sure would have been easier had that been done before adhering all the layers! Front facing:


Top facing - notice the notched element under the butterfly to minimize the popup feature:


Thanks for visiting my little blog! Your encouragement and friendship means so much. I am permanently homebound, leaving only for medical appointments. Each excursion takes tremendous toll on my body, but I'm still able to do "small things with great love".  I'm so grateful to still be living in this wonderful world, surrounded by beautiful people!

Products: Anna Griffin "You Are" sentiment stamps (set of 9), Inks: VersaFine Clair Nocturne, Distress Worn Lipstick, Dies: Tattered Lace Michaelmas Daisy, Imp Obs Butterfly DIE059-N, SB Marvelous Squares, SB Adorning Squares, LifeStyle Nesting Frames 7, MS Floral Crochet PAP, MS lace heart edge punch, Die-Versions Express Banners "Happy Day" and "Make a Wish", Cardstock: pink glitter, pink, white, white glitter, slate blue (shadow on sentiment) Other: Gold Detail EP, Copic RV32, 

May I please play in the following challenges?

  1. Seize the Birthday #303 Layer it Up Birthday 4/2 (each card has multiple layers inside and out)
  2. Triple B Challenge (April 3) inspiration board for birds butterflies blooms 5-1
  3. Crafting A Cut Above (April 7) Spring Time with Dies 5/1 (Dies used: Tattered Lace Michaelmas Daisy, Imp Obs Butterfly DIE059-N, SB Marvelous Squares, SB Adorning Squares, LifeStyle Nesting Frames 7, MS Floral Crochet PAP, MS lace heart edge punch, Die-Versions Express Banners "Happy Day" and "Make a Wish")
  4. Colorful Options (April 1) choose color(s) from the inspiration photo. I chose pink. 5/1
  5. The Four Seasons Challenge (April 1) Anything Goes Spring 5/1
  6. Craft Rocket Challenges #124 "Layer it Up" 4/28 (each card has multiple layers inside and out)
  7. As You Like It Challenge (April 17) Fussy & Fancy and Why 4/30 (while CAS are amazing, I have trouble keeping it simple. It's always satisfying to add more layers, more sparkle, unexpected details, and products to cards, and see the faces of the recipients - or to hear their sweet voices - exclaiming "how did you do that?" giggle)
Thanks for stopping by!


Saturday, November 23, 2024

Poinsettia Square Triad Skinny Cards - freebie sentiment


 Hello, friends! I hope you are doing well, and gearing up with sweetness for the upcoming holidays and festivities.


Many MANY years ago, before unmounted and clear stamps were the norm, and during a mega Stamp Show in Orlando, I purchased this beautiful poinsettia stamp from Mitra at Impression Obsession. It's a virgin, I'm shamed to say. Two cards are embossed in silver EP on dark blue cardstock. Two cards are stamped with VersaFine Clair and heat embossed with clear detail EP. Interestingly, in person, the clear EP cards look more fantastic than the silver EP! But through the camera lens, the Silver looks more majestic! 


After fussy cutting the embossed images, I "painted" with bleach so the colored cardstock would show through. Add extra bleach in the areas you would like highlighted. Be sure to use either very cheap brushes, or nylon brushes for this technique.


The magenta colored card was dry embossed and inked with distress inks.


The silver embossed cards are layered with black squares for extra drama. The turquoise layer is actually colored vellum, with edges folded behind white layers.


Card Interiors:


The digital sentiment is a freebie you can download in two versions.

My gift to you - Arrangements of the same sentiment for use on the inside or outside of your projects. Please do not sell these Sentiments. Use on any of your projects, including projects involving any design teams you might be on.

Click on the image to bring it to full size. Because of the changes Google Made with Blogger (June 2020), your image will appear to be solid black. Don’t panic. Right click and do a SAVE AS PNG. Once it is saved on your hard drive, you can open it and it will have a transparent background. I create PNGs instead of JPGs so they can be placed anywhere on a scene or project, and so backgrounds can be made using them. Please let me know if you have any problems. I hope they serve you well!

Enjoy!


Products: Stamps: Impression Obsession D4261 Poinsettia Square, IO Warmest Thoughts C5394 (interior of card), Colorado Craft Company Pine Cone and Branch BB264 (sentiment Merry Christmas), Silver & Clear EP, Bleach technique, Assorted colors of SU cardstock and TH distress inks, Turquoise and "white" vellum,  silver & turquoise glitter, Craft Essentials Diamond Tiles EF EFOB0013

Thank you for hosting challenges. I'd like to play in:

  1. Jingle Belles 11-22-24 "Banner Holiday" inspired by the poinsettias and sparkles in the fun banner Lauren made!) 12/4
  2. C.R.A.F.T. #741 Christmas - lovely poinsettias which are placed all over our home, and lots of sparkle for additional joy. (sep post) 11/27
  3. Beautiful Blossoms Challenge #23 (poinsettias) 12/12
  4. Christmas Bingo Challenges #10 Nov 1 - Using B COLUMN "Hand Colored with Bleaching Technique", "Slimline Cards", "Free" 

  5. Merry Little Christmas Challenges #59 12/15
Wishing you beauty!


Thursday, November 14, 2024

Serenity and Friends

Hello, sweet blogging friends! My versatile card today really is appropriate for nearly every occasion. A friend brought her Stampin' Up! stamps over, and I created the die cuts (etc) for a framed masterpiece. Together we came up with a beautiful card!

After die cutting SB Grand Decorative Labels One, I cut it in half to achieve two "border" pieces. I also cut a corner piece off to use on the top:


Each layer has distressed edges for a slightly vintage appearance, and added dimension.

Thanks for popping by today!


For new card makers - Directions to make the card:

  1. Cut card base for 5x7 card. Score at the 5" mark and fold in half.
  2. Place Spellbinders Grand Labels Four centered in a piece of card stock that is at least 5x7 and cut. 
  3. Place Spellbinders Grand Dec Labels Four cut side down on top of the "frame" from step 2.
  4. Center the frame die so that the aperture is lined up at the four "points".
  5. Die Cut, then flip the base cut plate so that the die cut paper is still inside the die. Place the embossing mat on top (it seems like the die will cut through the embossing mat, but it does not). Then use your embossing plate on top of that, and run it through your die machine again. This will dry emboss the decorative die and bring out all the gorgeous details.
  6. Cut brown "mat" 3.75" x 5". Set aside.
  7. Cut white card for stamping 3.5" x 4.75". 
  8. Stamp white piece as desired using favorite inks, leaving room for sentiment. Set aside for ink to dry.
  9. Choose a border punch, border die, or a die with decorative edges and just cut the edge of the die (that's what I did, using SB Grand Decorative Labels One).
  10. Adhere part of the border to the back of the brown layer so just the pretty part shows. Cut a smaller portion or corner for the center of the top, and adhere to same layer.
  11. Stamp sentiment to white panel and apply embossing powder. Heat Set.
  12. Distress edge of white stamped card with complementary ink colors, applying the lighter color first, and then the darker color on the very edge. Adhere to brown panel.
  13. If desired, die cut or punch some "grass-like" pieces for the bottom center, to create visual interest.
  14. Order in which to assemble: 
        a) attach white decorative edges to brown panel.
        b) attach stamped white panel to brown panel.
        c) adhere panel from a&b to card base (centering top and bottom, and sides)
        d) adhere decorative frame panel.
        e) adhere grassy die cuts.

Products: Stamps: Stampin' Up!, Silver Fox Stamps "Always in my thoughts" (no longer in business), Impression Obsession B6061 Think of You Days, Dies: SB Grand Decorative Labels One, SB Grand Labels Four, SB 5x7 Elegant Labels 4, IO Die178C Small Grass, Inks: DI: tea dye and pumice stone, SU, VersaFine Clair, Clear Detail Embossing Powder (for sentiments)

May I please play in the following fine challenges?

  1. Sisterhood of Crafters November 13 - Landscapes 11/23
  2. Pammie's Inky Pinkies #2445 AG 11/17
  3. Dream Valley Challenges #325 Anything Goes 11/23
  4. Inkspirational Challenges #328 Layer It 11/15 sep post (layered panels, pieces, and layered stamps)

Stamping hugs, (wouldn't it be fun to jump out of the water like this dolphin?)


Thursday, June 15, 2023

PSX Botanical Iris {Beautiful Blossoms Challenges} and freebies

 Hello, blogging friends! Thanks so much for visiting! I have an invitation for you -- to join us at the Beautiful Blossoms Challenge beginning today!


We are a
fun "mood-board-inspired" monthly challenge which features Flowers as the main focus.  

 The Mood Board is a starting point, and your artwork is where your imagination takes you! 

 I was inspired by: 

  1. The colors purple, pink and green.
  2. The Iris flower.
  3. The vintage feel of the Bouquet in a Vase.

Both cards feature the same colors with the exception of the shading around the frame, and the shadows around the image. Just that little bit of refinement changes the appearance of both cards!

I'll start off with the backs of the cards. The sentiment below is also being offered to you as a freebie gift in three versions. Just scroll down for it.


I have only made one other Z-fold card. But seeing so many Double-Z Fold fun fold cards recently, I felt inspired to make these simple creations. They are 5x7 size. Here is the front of the dark purple:

It was colored in Copic Markers after being stamped in VersaFine Clair Monarch Purple and heat set in Clear Detail embossing powder. This version is highlighted in the jade colors. On the left side of the card are three torn strips from Coordinations cardstock, which have been dry embossed, sanded and distressed. The image basically hides the details, unfortunately.


I am ashamed to admit this stamp is well over 20 years old and has never been inked. The interior has room for a handwritten message in a frame I doodled:

Next is the same image, colored in the same theme colors, but a lighter card stock, and purples around the edges rather than the jade greens. It completely changes the look of the colored image:

The horizontal green lines are ribbons. The "Double" part of the card has been dry embossed, as has the front left:

These were really fun to color and assemble, AND I learned a lot about coloring, embossing, and testing adhesives prior to using "unused" stash! (giggle)

QUESTION TIME!

When you color an image with any medium, or make a background, or add color to any project...  

do you often wait for several hours or even overnight to see how the colors set? I do that to determine if a strong enough tint was achieved (not that I'm a colorist), or if a few additional touches are needed. But then, I am a very slow crafter, and also have to correct boo-boos the next day (giggle), so I tend to start out too light, and progress to darker hues or tones after. What about you?

Thanks for stopping by. Hoping to see your amazing floral creations in the challenge!

Products: both cards use: PSX K-3131 Botanical Iris Stamp, VersaFine Clair Monarch Purple, Clear Detail embossing powder, Copic Markers, EKSuccess Dragonfly Punch, Spellbinders Fleur de Lis Rectangles S4-317 (one of my first ever SB dies!)       Dark Purple card - Cracked Pistachio Distress ink, Craft Concepts Secret Garden EF, Coordinations Dark Purple "Sandable" cardstock, Dies: Impression Obsession Grass DIE038-J,     Lavender & Green card - Seedless Preserves Oxide, Tattered Lace Victorian Rose EF, Ocean Mist Really Reasonable Ribbon

Freebies - A little late for Spring this year:

My gift to you - Arrangements of the same sentiment for use on the inside or outside of your projects. Please do not sell these Sentiments. Use on any of your projects, including projects involving any design teams you might be on.

Click on the image to bring it to full size. Because of the changes Google Made with Blogger (June 2020), your image will appear to be solid black. Don’t panic. Right click and do a SAVE AS PNG. Once it is saved on your hard drive, you can open it and it will have a transparent background. I create PNGs instead of JPGs so they can be placed anywhere on a scene or project, and so backgrounds can be made using them. Please let me know if you have any problems. I hope they serve you well!

Enjoy!


I would love to paraphrase this to say: Spring Flowers are Winter's Dreams revealed. Do you think that is acceptable, or do you prefer Khalil Gibran's exact and more beautifully poetic words?


this one is for a vertical setup:


Playing in the following fine challenges please!

  1. Worldwide Crafters and Colorists Challenge #6 AG (entry 1 of 3) 7/12
  2. A Perfect Time to Craft #6 AG (check 8/1)

  3. Classic Design Challenge #6 AG 7/1

  4. Pammie's Inky Pinkies #2323 AG 7/19

  5. Craft Rocket Challenges #104 Use Dies 7/1 (Spellbinders Fleur de Lis Rectangles S4-317, Impression Obsession Grass DIE038-J multiple times)

  6. Creative Creases
    #59 Anything Goes with a Fun Fold 6/22
  7. Dragonfly Dreams Challenges (June 4 "June") Fancy Folds Challenge 7/1 (both cards are double Z fold cards)
  8. Ally's Angels #71 Anything Goes 7/10
  9. Bastel-Traum Challenges #124 Flowers-Plants 7/15
  10. Craft Rocket Challenges #104 Use Dies (Spellbinders Fleur de Lis Rectangles S4-317 - one of my first ever SB dies! - Impression Obsession Grass DIE038-J)  6/29


hugs,