Hello, dear Blogging Friends!
These cards are dedicated to my cherished friend CLARA, who passed away unexpectedly last month.
I was recently inspired by a brand new blogger Shandy at MERMAIDS AND PAPER HEARTS, and blogging friends Leslie Miller and Connie Griffin, in making the following cards. Shandy inspired me via our conversation about colors and flowers, Leslie via Stencil Embossing (even though mine is with embossing folders instead), and Connie because she is always sharing techniques with us. So I've used VIRGINAL PRODUCTS from my stash!
Having been hidden away in my stash for years, my Crafters Companion Ornate Lace 3D embossing folder finally felt paper!
After dry embossing, VIRGINAL Encore pigment ink was applied. Each card involves different Encore ink colors:
first, dry emboss:
Then smoosh with pad and/or fingers:
In this case, Encore Ultimate Metallic Teal was rubbed on the raised areas, and then coated with a clear detail embossing powder that contained microfine glitter. The Spellbinders Bitty Blossoms were rolled in the same cardstock as the 3D folder, however, distress ink and platinum pearlescent paints were applied for visual interest. The Silver leaves are from upcycled can lid of Whey Protein Powder LOL. If you're on my blog, click on the photo to enlarge to better see the details:
Whole card:
Black cardstock, VIRGINAL Encore Ultimate Metallic Gold was rubbed on the most raised areas. In the lesser raised areas, I finger rubbed Encore Ultimate Metallic Pink in order to provide a tiny bit of visual dimension. The roses were colored in the same fashion:
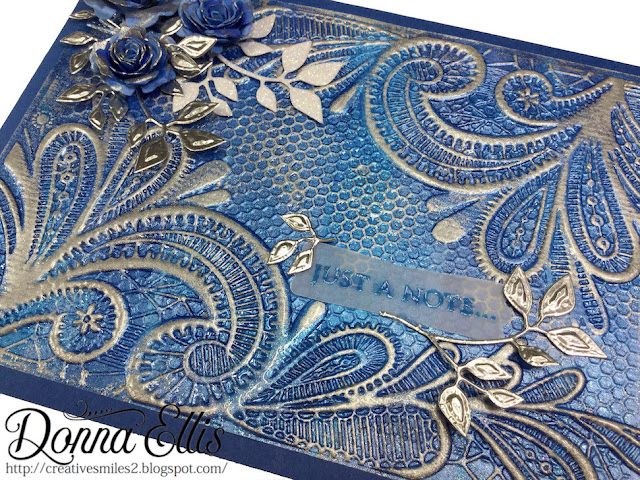
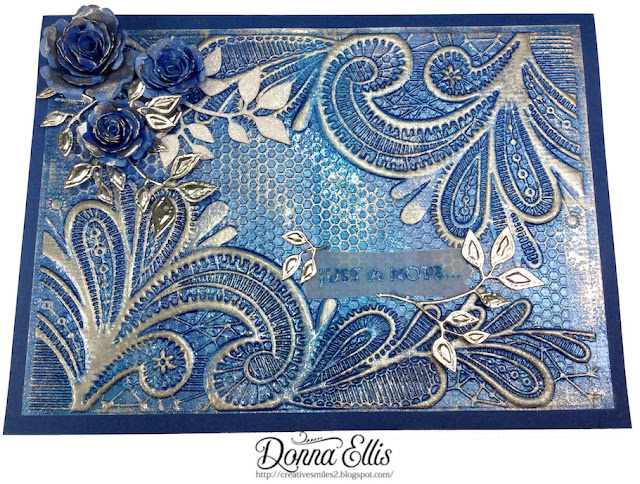
This bold blue background was fun and messy! On cardstock made for acrylics, I smooshed various acrylic paints up and down. With a very light brushing of wet glue, I then added tiny bits of blue and silver glitters into some areas. When the finished background was dry embossed, it looked pretty just as it was, but after adding VIRGINAL Encore Ultimate Metallic Silver to the top of the raised areas, it really brought out the glitz!
TIP:
There are two coats of clear detail embossing powder on top of the silver ink. Her Virginal Inkiness was so wet, that it took two coats. I learned that highly metallic pigment inks retain their metallic qualities when used with CLEAR embossing powder, because the metallic components IN the ink rise to the surface of the clear embossing powder.
The next card uses the same aqua paper, but with VIRGINAL Encore Ultimate Metallic Silver applied to the top of the raised areas. This card was also "distressed" with the silver ink. How different it looks in comparison to the card using the Teal ink!
This card front was dredged with clear embossing powder, heat set, and then dredged again with clear detail EP mixed with microfine glitter. It's my favorite! Which is your favorite?
Lastly, is the card inspired by and made for
Shandy. She likes the color turquoise (reminds her of mermaids) and she likes layered flowers. It was distressed and embossed with clear detail EP:
Thanks for stopping by! It was fun playing with goodies from my stash!
Products: Dies: Cottage Cutz Greenery 4x4, SU Modern Label Punch, TH Garden Greens, SB Carnations, SB Bitty Blossoms, Stamps: Hero Arts CL342 sentiment Inks: INKS & Mediums: assorted pearlescent acrylic paints, assorted pearlescent watercolors, assorted Encore Metallic inks, assorted distress and VFC inks, assorted embossing powders, Cardstock: acrylic paint paper, lavender, deep blue, pale blue, aqua, black, EMBOSSING FOLDER: Crafters Companion Ornate Lace 3D
Challenges I'd like to play in please:
- Just Us Girls Challenge #575 Trend Week Use An Embossing Folder 5/19 sep post
- Simply Create Too Challenge #168 Wet or Dry Embossing (I dry embossed the background, applied ink to the the dry embossed areas, then embossing powder and heat set. The sentiments are also heat embossed. 4/2
- Frilly and Funky (March 6) Something Vintage 3/17 sep post
- The Corrosive Challenge #3 Anything Goes 4/2
- A Bit More Time to Craft #135 AG 4/1
- A Perfect Time to Craft #3 AG 4/1
- Stamping Sensations Challenge (March) Monochromatic 4/5 (each card is monochromatic)
FREEBIE SENTIMENTS - my gift to you
My gift to you - Arrangements of the same sentiment for use on the inside or outside of your projects. Please do not sell the Sentiments. Use on any of your projects, including projects involving any design teams you might be on. Different shapes of sentiments work well for landscape or portrait shape cards.
Click on the image to bring it to full size. Because of the changes Google Made with Blogger in June 2020, your image will appear to be solid black. Don’t panic. Right click and do a SAVE. Once it is saved on your hard drive, you can open it and it will have a transparent background. I create PNGs instead of JPGs so they can be placed anywhere on a scene or project, and so backgrounds can be made using them. Please let me know if you have any problems. I hope they serve you well!
Enjoy!
Sympathy Verse:
Stamping hugs,


